
Adding contacts is simple enough on the engageSPARK platform. All you have to do is go into the Contacts page and upload your Excel or CSV file with the “upload contacts” button or simply add contacts one by one using the “add contact” button.

But what happens when you’ve got hundreds, maybe even thousands of contacts? Keeping track of all those contacts can become tricky and tedious.
Luckily, there are two ways to help bundle your contacts together: via Groups or Segments..
Difference between Groups and Segments
The difference between Contacts and Groups lies in how each contact is added. With groups, you manually add contacts into a group that you have previously created or specified in the excel file when you upload contacts. Once a contact is added to a Group it will stay there until you choose to remove it or move it elsewhere. For Segments, the system will automatically do the work for you, based on specific conditions you set, as soon as contacts are added to your account.
Both can class various contacts together into a same category.
You can check out our youtube video where you can see all of these in action.
Meantime, let’s take a look at how to create Groups and Segments and then add contacts to each one.
Group creation
To create a new Group, follow these steps:
Step 1: Go to the “Contacts” page. Press the option “Add Group” from the “Add Contact/Group” drop-down menu

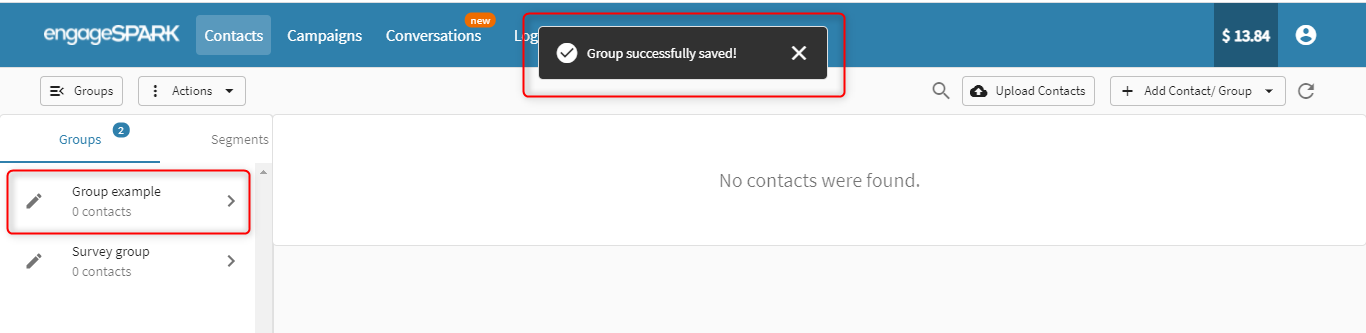
Step 2: Give your group a name and save!

Now your new group is saved under the Groups section!
Step 3: To add a contact, select the contact you want to add to your newly created group. Click the “Actions” drop-down menu on the top left:

Step 4: Choose the “Add Contact to Group” option.

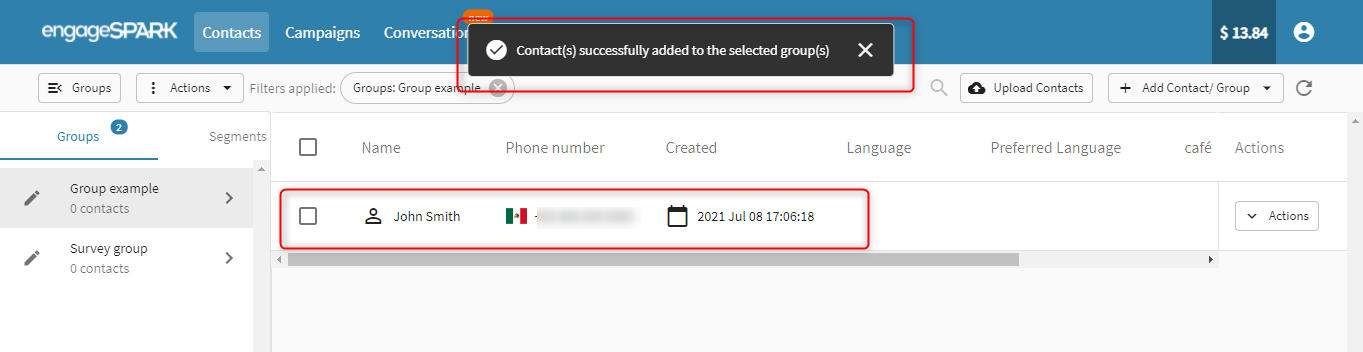
Step 5: Select the group in which you want the contact to be in and click the “Add to Group” button.

And we’re done!
Simple right?
Now… Segments
With Segments, contacts are automatically added based on certain contact attributes. For example, let’s say you create a custom field called “preferred language”. In the excel file containing the contacts you want to upload, each contact has already been assigned a preferred language. You also create different segments: English, Spanish, French, and German. Once you upload your file and the system will automatically put each contact in the appropriate Segment based on their preferred language.
Note: You can choose to create your Segments before or after uploading your contacts to the engageSPARK platform.
The magic doesn’t stop there!
Now let’s imagine that you’ve launched your survey and during the survey you ask your contacts what their preferred language is. By using the action: “Update contact” you can have those same contacts reclassified! If you had uploaded a contact with their preferred language being English and then during the survey they answer that they prefer Spanish, the system will automatically put them in the appropriate segment! This makes it easier for you to cater to your beneficiaries based on their needs and preferences.
Segment Creation:
Step 1: Head to the Contacts page and select the Add Segment option form the + Add Contact/ Group drop down menu

Step 2: Name your segment and add the conditioning you want and save

Your new segment is now saved under the segments section:

Here’s the fun part! Adding a contact to your newly created segment.
Step 3: When uploading your contacts make sure you have filled in the field that you used in your conditioning. In this example you see that one contact has their language set to English and the other to Spanish. By the end of this only the contact with English should be in our English Segment.

On the contacts page press the Upload contacts Button:

Step 4: Follow the appropriate uploading steps:

Go to the Segments section and click on the new Segment. You will see one of the two uploaded contacts because only one of them had English as their language:

TA-DA!
Trust us, this makes your contact management a whole lot easier! As always, reach out to us any time if you have any questions or suggestions.