Upload Bulk Contacts
Video guide
A few simple steps
1. Click the Contacts tab then click the down arrow on the New button and select Upload contacts.
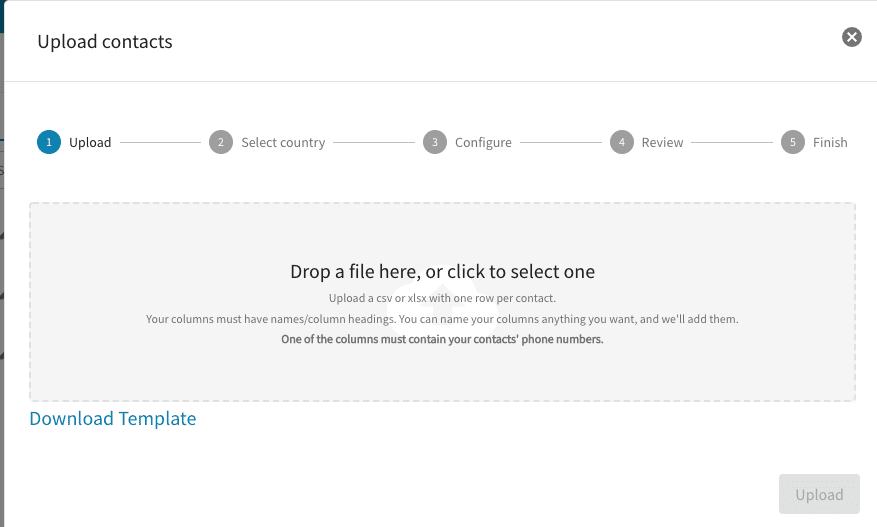
2. When the pop-up window appears, drag and drop the excel file you want to upload or click the space that shows like this to select a file from your computer:

Here’s a sample screenshot of what your Excel sheet can look like:

The system only requires you to have the Phone Number column where Groups and First Name column headers are optional. You can add other column headers such as Age, Gender, Address, etc as you like. There’s no limit to the number of column headers you can add to your excel sheet. Learn more about how to add contacts to groups.
Note: If your database of contacts (in excel) only consists of numbers from a single country, there’s no need to include the country code (e.g., 63). The system will automatically add it for you.
If your contacts are from multiple countries, you need to indicate the country code in the excel file (without the + sign).
When you’ve added your file, hit Upload.
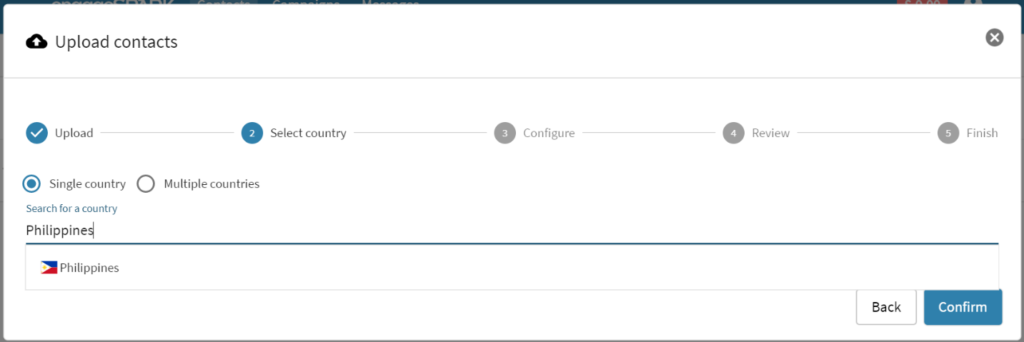
3. Upon uploading, you will be directed to the window below and will be prompted to select whether your contact list is from a single country or multiple countries.
- If you choose “Single Country”, just type in the country where your phone numbers belong. Your excel file can contain formats like below and the system will automatically clean them and append them with the correct country code of the specified country. The screenshot shows sample phone numbers in the Philippines in weird formats.

- If you choose “Multiple Countries”, you will be notified that the phone numbers in your excel file should have their respective country codes. The phone numbers can be in weird formats as well (like in a single country). However, you have to make sure that each is accompanied by the respective country codes of the country where the phone numbers belong. The screenshot shows sample phone numbers from the Philippines, USA, and India.

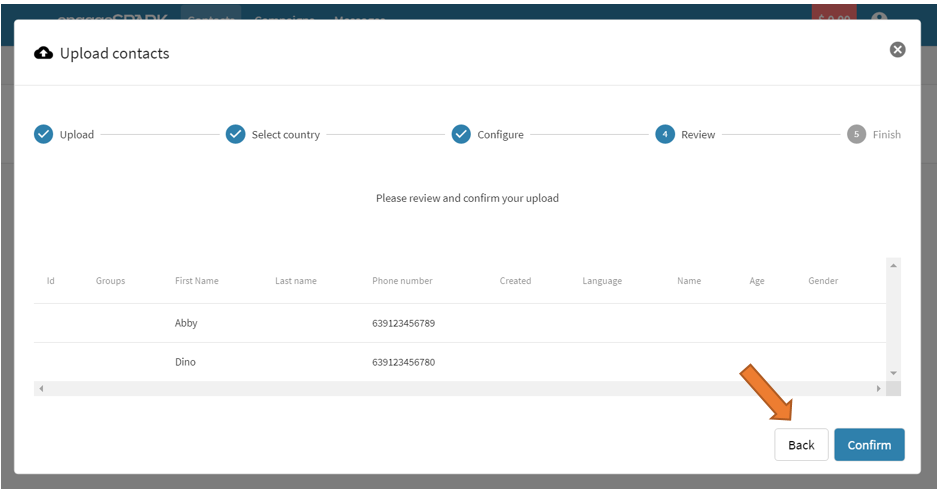
After which, click Confirm to move to the next step.
4. In the Configure step of uploading contacts, it will show you the column headers our platform captured from your excel file that matches the existing columns on the contacts page. Make sure that the reflected column headers are the same as the existing columns on the contacts page. You can also add new columns (that are in your excel file but not yet on the contacts page) by clicking the Add new field. Then, on each column dropdown, select the newly created column header that matches the column header name on your excel file. When done, just click Confirm to continue.


Have questions or need a little extra help?

