Are you having problems in finding specific test cases among the hundreds, or perhaps thousands of test cases in your test suites? Are you having difficulty remembering the last time when a specific test passed or failed? Perhaps you’ve tried using tools such as Google Docs/Sheets, Trello, MS Excel or even a plain text file, and got annoyed by their limitations when it comes to managing your test cases? Well, fear not, for you are not alone. We at engageSPARK went through those struggles, too, and we searched high and low for the best test case management tool that will address our needs. In this blog, we will tell you all about the tool that we found, as well as a few pointers on how to use it.
Searching for a suitable test case management tool was not an easy task. As we went along our research, we tried to look for a tool that has the following requirements based on our needs:
1. Open-source
2. Can track test cases execution
3. Can easily search through test cases
4. Can import and export test cases so that we can easily import our existing test cases and can easily export it if there’s other tools to use it
After trying out several other tools, we found Squash TM to be best suited for our needs. It meets all our requirements, plus it has additional features that we found useful as well.
So what is Squash TM?
Squash TM (Test Management) is an open source tool for managing test cases. It helps you to structure, categorize and track the execution of your test cases. Squash TM is a self hosted web application.
How to use Squash?
There are many things that you can do with Squash, such as creating requirements, creating test cases and executing test cases. Here, we’ll give you an example on how to use their features:
Create a test case
Here are the steps to create test cases:
1. Go to Test Cases Workspace by clicking this icon ![]()
2. Click Test Project-1 icon ![]()
3. Click the + sign, and then select New folder or New test case (You can name it based on what your test case is about. For example login_test)
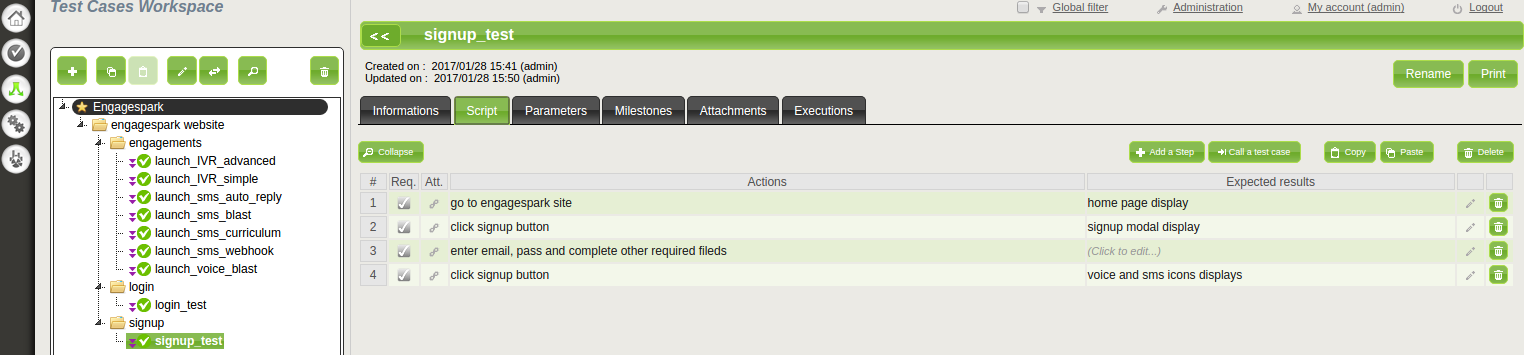
4. Next, go to Scripts tab to add steps ![]()
5. You can now add steps in your first test case by clicking Add a Step button ![]()
6. You now have your first test case!

Run test case
We will run your new test case.
1. Go to Campaign Workspace by clicking this icon ![]()
2. Click Test Project-1 icon ![]()
3. Click the + sign and select New Campaign (You can name it based on what the test case is about. For example login_test)
4. Click the + sign again and select New Iteration (You can name it based on what the test case is about to execute)
5. In the Execution Plan tab, click ![]() to add test case from “Test Cases Workspace“
to add test case from “Test Cases Workspace“
6. Expand the Test Project-1 and select test case
7. Click Associate button ![]() and click the Back button
and click the Back button
8. In the Execution Plan click the Test Case link ![]()
9. Click New execution button. You’ll see the Execution

10. From the image above, you can now click the Run icon each step and select the status based on the result
![]()
11. You can also add comments in the Comments table to add additional information on the test result.
Track the test case execution
And now we’ll track the execution time and status of your test case run.
1. After running the test case, go to the Test Cases Workspace
2. Click the test case you ran and click the Executions tab . From this tab, you can track the execution time and status of your test case. 
This is how it looks like after executing the test case multiple times:

Features list
Squash features allow you to organize your test cases well because it has the ability to create a folder or subfolder, with different workspaces for requirements, test cases, and execution/campaign, and categorize the test cases. The following lists are the features of Squash TM:
- Print test cases
- Create test cases
- Can add new user
- Can add new project
- Run/execute test cases
- Import/export test cases
- Can search specific test case
- Can track test cases execution
- Can assign user to execute test cases
- It has designated workspace for requirement, test cases, campaign/execution
How to test Squash locally?
You can follow these steps to test squash locally:
1. Pull the docker image using this command in your terminal. (Note: Please make sure that the docker already installed in your PC.)
docker pull logicify/squash-tm
2. To check if the the docker image was successfully pulled.
docker images
3. You should be able to see the REPOSITORY logicify/squash-tm
4. Now let’s run the image
docker run -d --name squash_test_management logicify/squash-tm
5. Get the IP address of squash_test_management container (Note: Docker version 1.12.3) :
docker inspect -f '{{range .NetworkSettings.Networks}}{{.IPAddress}}{{end}}' squash_test_management
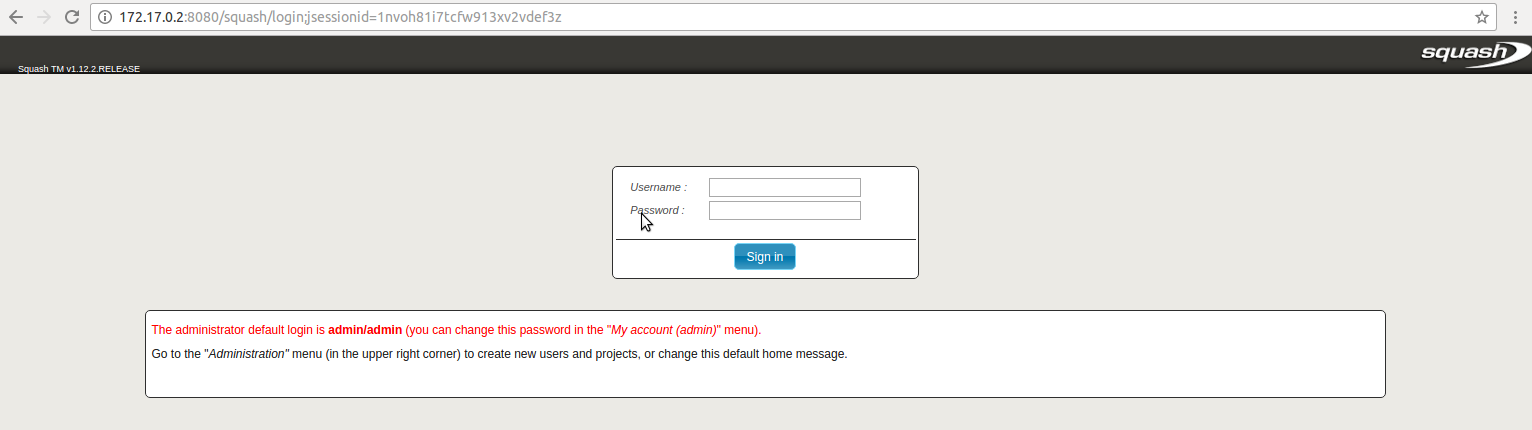
6. Open a chrome browser and enter this in the url
Ip Address:8080/squash
And there you go, you can now use your Squash Test Management.
With Squash TM helps us a lot in organizing our test cases. It saves us a time, especially in searching a specific test case and we would be able to easily track the execution time and status of our test cases.